ALL YOU WANT OF LIFE; EVERY DREAM, EACH WISHFUL BLISS, IS WAITING... TO BE CREATED.

Wednesday, November 25, 2009

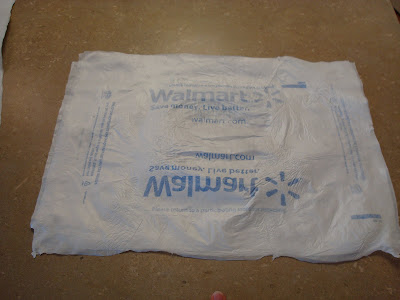
Fusing Plastic Bags - Waterproof Material

I came across this idea while browsing through Tipnut.com, and I wanted to give it a try; especially since my plastic grocery bag stock was overtaking the enormous box I keep them in.
The idea is to fuse your bags together to make a thicker, durable layer, which can then be turned into a waterproof lining for all sorts of things.  Here's how to do it:

Fusing Plastic Bags Tutorial

Materials Needed:
- Plastic Bags (thin, flimsy ones work the best - I prefer Macey's)
- Iron
- Parchment paper, freeezer paper, or regular paper
Note: Be sure to do this outside if possible, or on a nice day when you can open your windows or door, to avoid potentially brain-damaging fumes.
Step 1:
- Flatten out the bags
- Trim the bottom seams
- Trim the handles
Step 2:
- Open the bags completely, and smooth out
- Layer bags on top of each other

Fusing works best when you have between 6-8 layers, so you will need to pile 3-4 bags on top of each other, or you can pile 2 bags, and then fold them in half.

The ink on the bag will come off and make a big mess if exposed on the outside, so either turn the bags inside out, or make sure that 2 inked surfaces face eachother on the inside.
Step 3:
- Sandwich plastic bags between paper
- Turn on your iron (I put mine on #4 out of 6, you'll have to experiment).
- Iron on top of the paper; keeping it moving constantly

You will need to iron each 'section' for about 10-15 seconds, then flip the paper and do it on the other side.
Corners and edges may need some extra time - but do not overdo it, or the bags will shrink, warp, and/or littles holes will burn through.
- Peel a corner of the paper back to see if the plastic is fused together; it should appear as one piece.
Step 4:
- Cut around the raw edges to make a smooth one

Uses:
You can use these to make all sorts of things.  Some ideas from Tipnut:
- re-usable grocery totes
- wallets
- floor cushions
- waterproof linings for beach bags and makeup clutches
I am planning on making some waterproof bed-liners and baby bibs.

Tuesday, October 27, 2009

Happy Birthday Weave Card

So easy to make... Take a single background piece and cut it into 4 pieces; spacing them evenly apart. Cut an alternating paper strip in half, and weave down one side. Secure everything with staples. Tie it all together with a matching birthday hat.

It's Pasture Birthday Card

Monday, October 26, 2009

You'd Better Not Pout Christmas Gift Tag

This is the perfect tag to accompany simple Christmas gifts for your neighbors.  Rafia is used to tie together 3 small bells, as well as the string that ties it to the gift.  The 'you'd better not pout' is a metal sticker (which I raised).  Red and green textured paper make up the background, and the white tag allows you to write on the back.

Thinking of You Gift Bags

Another perfect bag! Here's how to do it:
- Start with a small box (single serving cereal boxes work best). Wrap the box with desired paper; just like you are wrapping a present, only leave one end open, which will be your top.
- Then fold a slightly smaller width paper in half (gray paper in photo), and secure the inside of it to the outside of the back side of the top of the bag. The other half of the black paper folds over the front, closing the bag.
- Decorate the front half of the gray paper however you wish. I used a pink background to accent my 'thinking of you' banner.
- Accessorize: I added a 'hi' paper clip, some white ribbon, and jeweled the center of my star.
- Fill bag with candies or a gift and you are good to go!

Queen for a Day Gift Bag

Yet another additon from my sister Melissa.  I love these little gift bags!  Here's how to do it:
- Start with a small box (single serving cereal boxes work best).  Wrap the box with desired paper; just like you are wrapping a present, only leave one end open, which will be your top.
- Then fold a slightly smaller width paper in half (black paper in photo), and secure the inside of it to the outside of the back side of the top of the bag.  The other half of the black paper folds over the front, closing the bag.
- Decorate the front half of the black paper however you wish.
- Fill bag with candies or a gift and you are good to go!

Butterfly Blank Card

This photo didn't turn out as well as I would have hoped.  There is nothing spectacular about the layout, but I love the look (size wise).  This card has a larger front than back (which I have never seen before), and which you can't really see from the photo.  The white surface is the same size in the front and the back, but you can only see the bottom line of it in the photo (to the right of the butterfly, after the purple paper).  The purple paper is glued to the folded front portion of the white, which leaves a longer white portion in the back (longer, but not as wide).  Anyway, I don't know if that makes sense, but it looks pretty cool... definatley different.