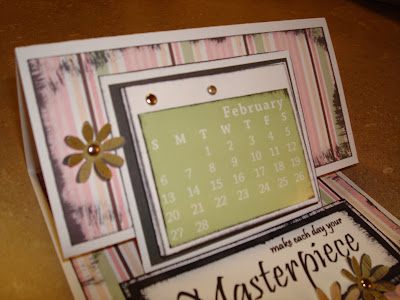
My mother-in-law was describing to me this cute little calendar her ward was making for a Relief Society get together.
I was intrigued...
I have been needing a little calendar to sit on my desk.
Not one to write on, just something simple, so I can know what day it is.
A few days later I got a cheapo calendar in the mail, and all the pieces just fell together...
There was a page of monthly caldendars for 2011 at the back
As well as the 2010 monthly calendars at the bottom of each month...
This is what I came up with.
Pop-Up Quote Calendar
Here are some other views...
Materials Needed:
You can mix and match colors (obviously), but I only used 3 different paper colors: white, black, and the pink print
Monthly Calendar Layouts
(I got mine from the caledar in the mail, but you could print them off of the computer or something)
Mine measured around 2.5x3"
White Paper
1 - 12x6" heavy cardstock
1 - 3.75x3.125" heavy cardstock
1 - 2x4.75" heavy cardstock
1 - 1.5x4.25" heavy cardstock (this is for your quote - I printed mine off of the computer)
12 - 3.25x2.67 plain paper
Black Paper
1 - 3.5x2.87" piece
1 - 1.75x4.5" piece
Pink Print
1 - 5.75x5.75" square
1 - 5.75x2.75" piece
You will also need:
5 brads
glue or tape or sticky squares
raised foam stickies
and a Flower Punch
Here's How:
Score the 12x6" white cardstock piece at 3" and 6"
Fold the score lines to make the calendar
Next, ink all the edges to all of your remaining papers (yes, all of them).
This is an optional step, but I think it makes it look SOOOO much better.
I used black ink.
After they dry, take the large piece of printed paper, and position it in the middle of the unfolded portion of the calendar.
Are the crazy dimensions starting to make sense now? Everything should be just smaller than the piece that it fits on, so it makes a wonderful looking border...
Then take the smaller piece of printed paper and position it in the middle of the upper flap of the calendar
Next, take all of your monthly calendars and stick them to the 12 pieces of white paper
Then you can stick the black square paper to the white one...
This will be the background for the months.
Figure out where you are going to stick your brads, and make the holes with a large sewing needle (or a brad hole punch)
(I only did two holes, because some of the monthly calendars were bigger than others, and if I did 3 all the way across the top, it would have overlapped the month)
Next, stick your brads through all of the months and the background paper.
If they are long enough, put them through the calendar paper as well. If not, just tape or glue it on.
Position it about 1/2" from the top, so it hangs about 1/2" off the bottom
You should be left with your quote paper, a black paper, and another white paper.
They stack on top of the other, like this:
Now, get your raised foam stickies...
The raised stickies should be placed on the top portion of the quote.
Use regular glue or tape for the bottom portion of the quote.
(Find out why in a second)
Finally, attach the quote to the bottom portion of the calendar.
I positioned mine about 3/4" from the bottom.
The calendar will get stopped by the raised portion of the quote, like this...
This will keep everything upright... so the calendar wont lay down flat.
Now it's time to accessorize!
I added 3 paper flowers, and used the same brads to secure them.
And you're done!
Super cute if you ask me...
One for 2010, and one for 2011 (or for the gift giving box, more likely)...


No comments:
Post a Comment